


Docker Containers Inherit Your Connection’s Exposure by Default#
Docker containers share the host’s network stack by default.
That means any service you run is exactly as exposed to the outside world as the raw connection it rides on, with nothing standing between your traffic and anyone watching that connection.
Route it through a VPN container instead, and requests leave through the VPN, not your raw connection — the container’s real IP disappears.
This guide builds a Docker Compose file that puts one or more services behind a VPN container using network_mode: service:vpn. You’ll:
- Set up the VPN container
- Wire dependent services to route through it
- Verify traffic actually goes through the VPN once everything’s running
(Which host those containers should even run on is a separate question — see Not every Docker container belongs on the NAS.)
Basic Docker familiarity helps but isn’t required — the official Docker documentation covers anything unfamiliar here.
Docker Compose Handles Orchestration; a VPN Container Handles Privacy#
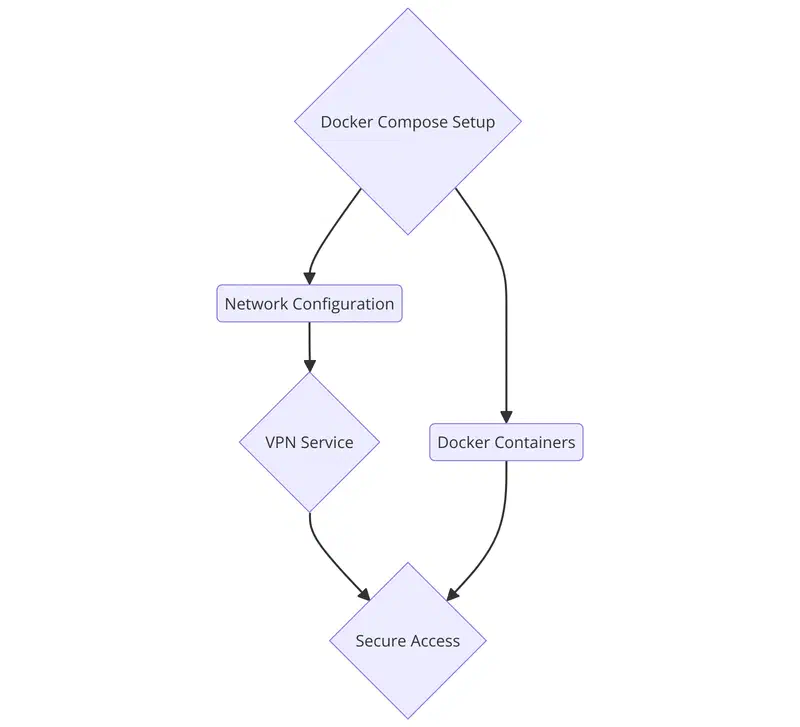
Docker Compose Replaces a Pile of docker run Flags with One File#
Docker Compose defines your services, networks, and volumes in one YAML file instead of a pile of docker run commands. A multi-container setup that would otherwise take a dozen flags to launch comes up with one.
Docker Compose Keeps Multi-Container Environments Consistent#
- Simplifies multi-container deployments
- Ensures consistency across development, testing, and production environments
- Streamlines application scaling and maintenance
Docker Compose Shows Up Most in Microservices, Dev, and CI/CD Work#
- Microservices architecture
- Development environments
- Continuous integration and continuous deployment (CI/CD) pipelines
Why Use a VPN with Docker Services?#
A VPN encrypts a container’s outbound traffic and hides its real IP behind the VPN provider’s. That matters most for services that talk to external networks or handle data you don’t want tied back to your home connection.
Routing Through a VPN Also Protects Data in Transit#
- Securing communications between distributed services
- Protecting data in transit from eavesdropping
- Ensuring privacy for services that need to access external resources

Without a VPN, Containers Inherit the Host’s Full Exposure#
A container with no VPN in front of it sends traffic exactly the way the host would: same IP, same exposure to anything watching the host’s connection.
Routing a service through a VPN container fixes this at the network layer, instead of trusting each service to handle it individually.
Network Isolation Introduces Its Own Management Problems#
- Potential exposure of sensitive data
- Difficulty in managing network policies
- Ensuring consistent VPN connections for all services
Route it through the VPN container instead, and the outside world sees the VPN’s exit node instead of your router blinking away in the closet.
Get Docker and Docker Compose Installed Before Configuring the VPN#
Docker Installs via apt; Docker Compose Installs via a Direct Download#
Steps to Install Docker:#
Update Your Package Database:#
Ensure your system’s package database is up-to-date
sudo apt updateInstall Prerequisite Packages#
Install packages that allow apt to use repositories over HTTPS
sudo apt install apt-transport-https ca-certificates curl software-properties-commonAdd Docker’s Official GPG Key:#
Add Docker’s GPG key to verify the integrity of the software.
curl -fsSL https://download.docker.com/linux/ubuntu/gpg | sudo apt-key add -Add Docker Repository:#
Add Docker’s official repository to your sources list.
sudo add-apt-repository "deb [arch=amd64] https://download.docker.com/linux/ubuntu $(lsb_release -cs) stable"Install Docker:#
Update the package database again and install Docker.
sudo apt update
sudo apt install docker-ce
Verify Docker Installation:#
Confirm Docker is installed correctly by running:
sudo docker --versionSteps to Install Docker Compose#
Download the Latest Version:#
Download the Docker Compose from its official Github repository.
sudo curl -L "https://github.com/docker/compose/releases/download/1.29.2/docker-compose-$(uname -s)-$(uname -m)" -o /usr/local/bin/docker-composeApply Executable Permissions:#
Make the downloaded file executable.
sudo chmod +x /usr/local/bin/docker-composeVerify Docker Compose Installation:#
Check the version to ensure Docker Compose is installed.
docker-compose --versionCreating a Docker Compose File#
Basic Structure of a docker-compose.yml File:#
A docker-compose.yml file defines the services, network, and volumes used in your application. Here is the basic structure:
version: '3.8'
services:
  # Define your services here
networks:
  # Define custom networks if needed
volumes:
  # Define named volumes if needed
Explanation of Key Directives:#
version:Specifies the version of the Docker Compose file format.services:Defines the containers to be run as the part of the application.image:Specifies the Docker image to use.build:Allows specifying a build context and Dockerfile.ports:Maps container ports to host ports.volumes:Mounts host paths or named volumes.networks:Connects services to specific networks.
networks:Customized networking configurations for services.volumes:Manages data persistence using named volumes.
Example: Basic Docker Compose File#
A simple example with two services, a web server and a database:
version: '3.8'

services:
  web:
    image: nginx:latest
    ports:
      - "80:80"
    networks:
      - webnet

  database:
    image: postgres:latest
    environment:
      POSTGRES_USER: exampleuser
      POSTGRES_PASSWORD: examplepass
      POSTGRES_DB: exampledb
    volumes:
      - db-data:/var/lib/postgresql/data
    networks:
      - webnet

networks:
  webnet:

volumes:
  db-data:
This is the whole shape of a Compose file: services, networks, volumes. Everything from here is just filling in services: correctly for a VPN-routed setup.
Configuring Each Service to Use the VPN#
Not Every VPN Provider Works Cleanly Inside a Container#
A few factors decide whether it will:

Key Factors to Consider:#
- Reliablity: Choose a provider with a reputation for uptime and reliability.
- Security Features: Ensure the provider offers strong encryption and no-log policies.
- Compatibility: Verify that the VPN service is compatible with Docker and can be used within containers.
- Performance: Consider the speed and latency, especially if your servicers require high bandwidth.
- Support: Look for providers that offer good customer support and detailed documentation.
OpenVPN Is the Flexible Default; WireGuard Is the Faster Alternative#
OpenVPN is the flexible, open-source default here. WireGuard is the other real option — simpler, faster, less config surface. Either works fine inside Docker.

Setting Up the VPN Container#
Pulling a VPN Container Image (e.g., OpenVPN):#
Pull the OpenVPN image from Docker Hub first:
docker pull kylemanna/openvpnThat pulls the image you’ll configure next.
Configuring the VPN Container:#
- Initialize the OpenVPN Configuration: Create a directory to store the OpenVPN configuration and initialize it:
mkdir -p /path/to/your/config
docker run -v /path/to/your/config:/etc/openvpn kylemanna/openvpn ovpn_genconfig -u udp://YOUR_VPN_SERVER- Generate the Certificates: Generate the necessary certificates and keys:
docker run -v /path/to/your/config:/etc/openvpn -it kylemanna/openvpn ovpn_initpkiThis initializes the PKI (Public Key Infrastructure) that generates OpenVPN’s certificates and keys.
- Start the OpenVPN Container: Start the container with the generated configuration:
docker run -v /path/to/your/config:/etc/openvpn -d -p 1194:1194/udp --cap-add=NET_ADMIN kylemanna/openvpnThis runs the OpenVPN container in detached mode, maps the port, and grants the network administration capability it needs.
Modifying the Docker Compose File#
Adding the VPN Container to the docker-compose.yml File:#
Add the VPN container to your docker-compose.yml, then point your other services at it.
Configuring Services to Route Traffic Through the VPN:#
Set each dependent service’s network_mode to the VPN service’s name, and its traffic routes through the VPN container automatically.
Example: Updated Docker Compose File with VPN:#
A step-by-step example:
version: '3.8'

services:
  vpn:
    image: kylemanna/openvpn
    cap_add:
      - NET_ADMIN
    ports:
      - "1194:1194/udp"
    volumes:
      - /path/to/your/config:/etc/openvpn
    environment:
      - OPENVPN_PROVIDER=YourProvider
      - OPENVPN_CONFIG=YourConfig
    networks:
      - vpn_net

  web:
    image: nginx:latest
    depends_on:
      - vpn
    network_mode: service:vpn
    ports:
      - "80:80"
    volumes:
      - ./web:/usr/share/nginx/html
    environment:
      - VIRTUAL_HOST=yourdomain.com

  database:
    image: postgres:latest
    depends_on:
      - vpn
    network_mode: service:vpn
    environment:
      POSTGRES_USER: exampleuser
      POSTGRES_PASSWORD: examplepass
      POSTGRES_DB: exampledb
    volumes:
      - db-data:/var/lib/postgresql/data

networks:
  vpn_net:

volumes:
  db-data:
In this example:
- The
vpnservice pulls up OpenVPN and does the actual connecting. webanddatabaseboth setnetwork_mode: service:vpn, so they share the VPN container’s network stack instead of getting one of their own.- Every request either service makes now leaves through that shared network stack, so it exits through the VPN automatically.
That’s the whole pattern: define the VPN service, then set network_mode: service:vpn on anything that needs to ride behind it.
Verify the VPN Connection Before You Trust It#
Don’t Trust the Compose File Without Checking the Exit IP#
Verifying the VPN Connection:#
A few checks confirm the VPN connection is actually working:
- Check the VPN Container Logs:
Inspect the logs of the VPN container to confirm it has started correctly and is connected.
docker logs <vpn-container-name>- Test the VPN Connection:
Run curl or wget from inside a container on the VPN and check the external IP. It should differ from your local IP and match the VPN server’s.
docker exec -it <container-name> curl ifconfig.meEnsuring Services are Behind the VPN:#
Same check, service-side: access the service and look at its outgoing IP.
- Check Service IP:
From within the service container, use the following command:
docker exec -it <service-container-name> curl ifconfig.meIf that IP matches the VPN’s, the service is routing through the VPN correctly.
Common Issues and Solutions#
Network Connectivity Issues:#
- Issue: Services cannot connect to the internet.
- Solution: Double-check the VPN container configuration, including the network mode setting in the
docker.compose.ymlfile.
- Solution: Double-check the VPN container configuration, including the network mode setting in the
VPN Container Fails to Start:#
- Issue: The VPN container doesn’t start / keeps restarting.
- Solution: Check the logs for any errors, and check that the configuration files and credentials you provided are correct. Make sure that the required ports are not bloced by a firewall.
Services Not Routing Through the VPN:#
- Issue: Services bypass the VPN and use the host network.
- Solution: Verify the
network_mode: service:vpnsetting in thedocker-compose.ymlfile. Verify that the dependent services start after the VPN container.
- Solution: Verify the
Tips for Troubleshooting#
Useful Commands and Logs to Check:#
- View Container Logs:
Check the logs for the VPN container and the services for any error messages.
docker logs <container-name>- Inspect Network Settings:
Verify that the network settings of your containers are properly configured.
docker network inspect <network-name>- Check IP Routes:
Check the containers’ IP routing tables to confirm traffic routes through the VPN.
docker exec -it <container-name> ip routeCommunity and Support Resources:#
Docker Documentation: The official Docker documentation is the defacto resource for troubleshooting and best practices when using Docker.
OpenVPN Documentation: The OpenVPN documentation will help you in determining specific configurations and in general troubleshooting.
Community Forums: Search your issue on community forums such as Stack Overflow, Docker Community Forums, and Reddit.
The network_mode: service:vpn Line Does the Real Work#
That one setting forces a dependent service to share the VPN container’s network namespace instead of the host’s. Everything else in this guide (provider choice, the OpenVPN setup, the verification commands) just gets you to a Compose file where that line does its job correctly.
If curl ifconfig.me from inside a dependent container returns the VPN’s IP instead of your own, it’s working.